Dry Suit or Dry Top Gasket Replacement
Many folks use the warm months to enjoy paddling in a dry top, as well as send in their dry suits for pressure tests and gasket repairs. However, when a gasket blows it doesn't take your paddling habits and outside temperatures into consideration. Replacing gaskets isn't a tough task, but takes a little practice and some patience.
As with many do it your self projects there are a bunch of ways to do this task. You will develop your own steps and box of tools as you do this but here is a good place to start.
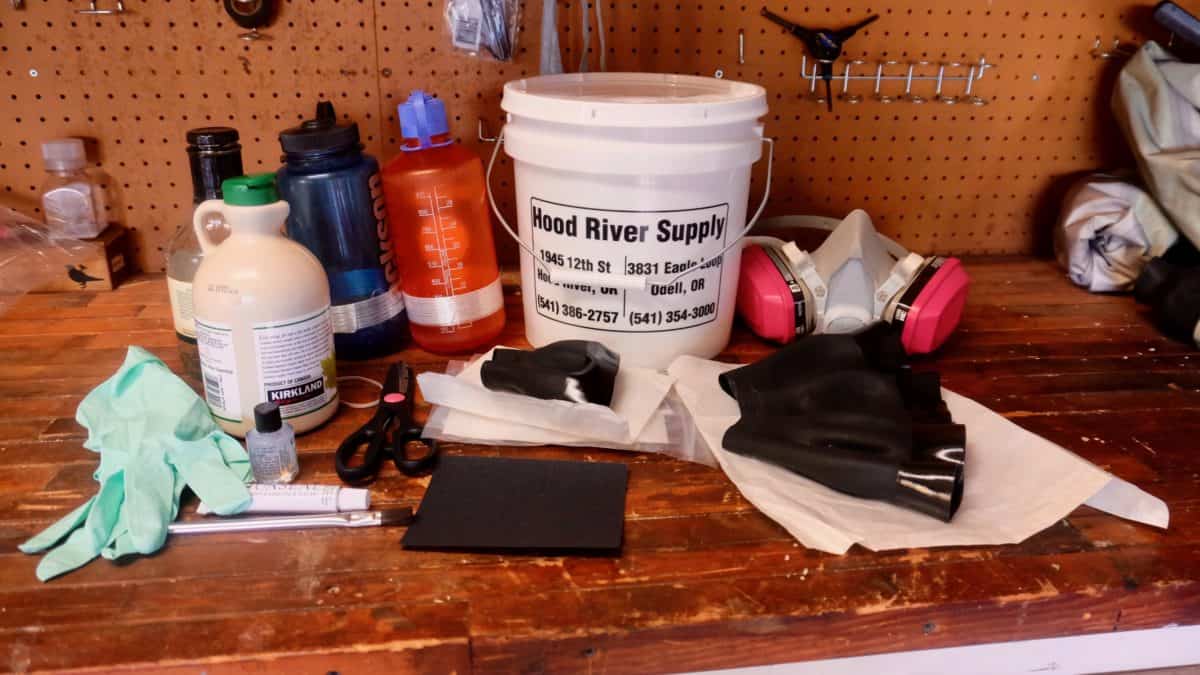
Tools
- Gaskets - wrist, neck, or even ankle
- Aquaseal
- Cotol or acetone for cleaning
- Sandpaper 150 or 180 grit
- Lint free cloth
- Form - small bucket, wattle bottles, soup cans, et cetera
- Scissors
- Brush
- Gloves
- Well ventilated room, maybe a respirator
- Rubber Bands

Neck Gasket Repair Tools
Step 1
Find a form that fits snug into garments opening. I have found a small bucket works well for my neck gasket, and a Nalgene bottle for my wrist gaskets. You want a good snug fit, as it will be easier when finishing the glue stage. Avoid using tapered shape forms as your garment may move when you are working, not helpful at all.
Step 2
Remove the old gasket. Depending on the condition of the old gasket a new one can be glued directly to the old one. Just cut it out, leaving about 1"-1.5" of old gasket from the garment material. DO NOT CUT THE GARMENT MATERIAL! If the old gasket is dry, cracked, or torn all the way to the material just remove the entire gasket. Using a hair drying will help loosen the glue and the gasket should come off with a little effort. Clean the area of old glue the best you can.
Step 3
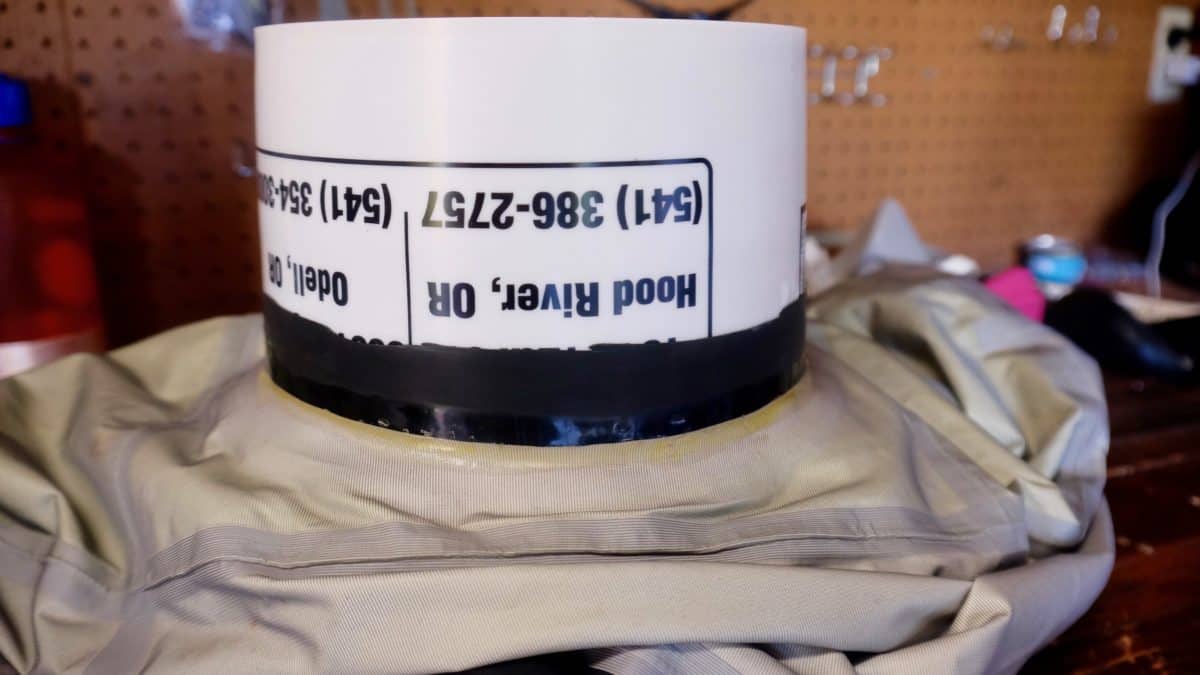
Put the garment over your mold. If your mold is a little bit loose you can use strapping tape to make it a little bit tighter. It also helps prevent glueing your garment to the mold.

Place the garment over the mold.
Step 4
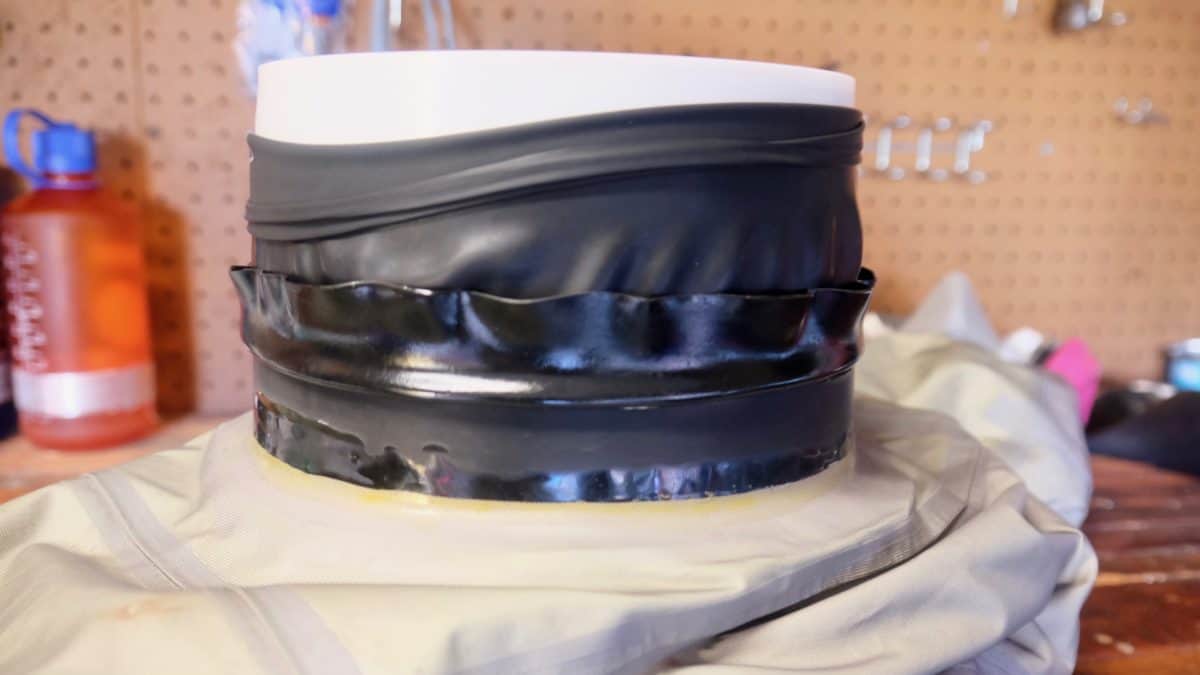
Stretch your new gasket over the mold. The shinny side is the gluing surface, make sure that side is touching your new gluing surface. The new gasket should completely cover your gluing surface. Take your time to get everything lined up perfectly. Flip up the new gasket to expose your gluing surfaces.

Glue Prep
Step 5
This is clean and glue prep time. With your 150 or 180 grit sandpaper buff the old gasket or material. Clean with Cotol to remove debris and oils. The shinny side of the new gasket doesn't need to be buffed, just clean with Cotol.

Glue Time
Step 6
It is now time to glue. There are two ways to go about your glue, cure time is the mayor factor.
- Straight Aquaseal will be a bit more difficult to spread, but a thin layer on both sides will do. Cure time will be 8-12 hours.
- Aquaseal with a 3:1 Cotol mix will be easier to spread, and a thin layer on both surfaces will do. Be careful when adding Cotol, too much can lead to a poor glue bond. Cure Time will be 2 hours.
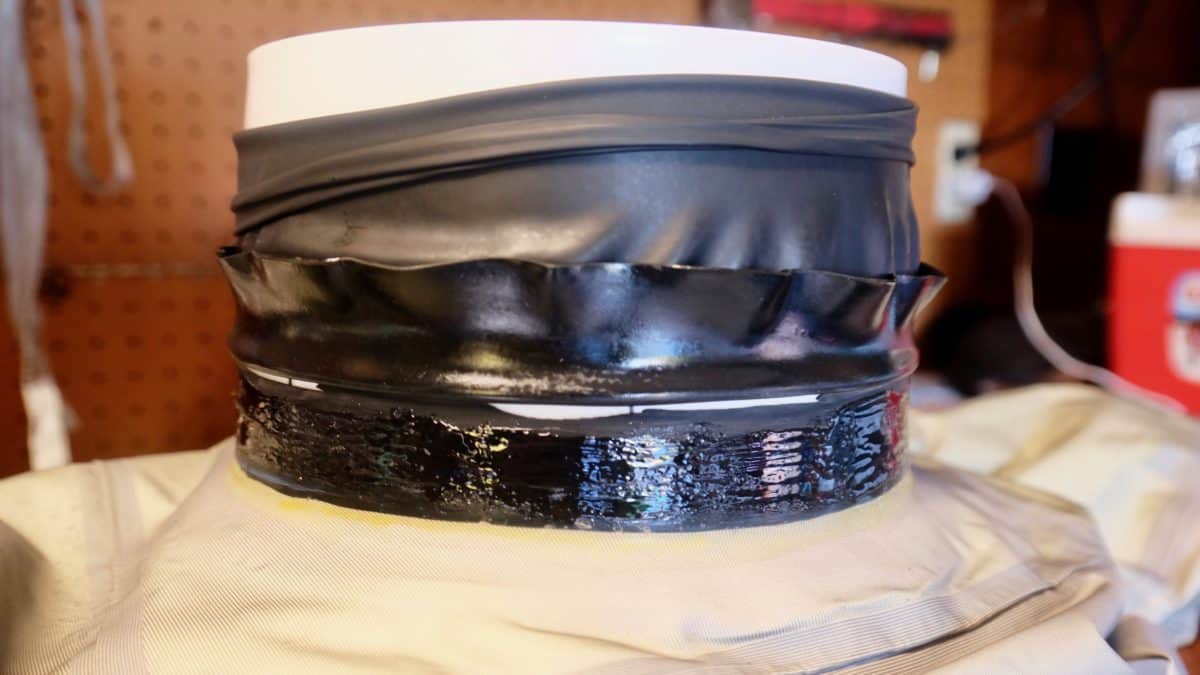
If you added Cotol to your glue wait 30 minutes for the glue to partially cure and become tacky. Than fold it over and smooth everything out. Use a couple rubber bands or a cam strap to keep everything held together.
Straight Aquaseal gives you two different ways to finish things out. You can fold your gasket down right away and smooth everything out. Don't forget to add some rubber bands, or even a cam strap to keep everything tight. You can also let your Aquaseal cure over night, and come back and wipe your glue with some acetone before flipping everything together.
Step 7
Monitor your work as it is curing. Keep an eye out for things moving, air bubbles, or fold forming.
Final Thoughts
Once everything is cured you should be good to go. Inspect your gaskets often. Keep them out of the sunlight and clean them with 303 to help keep them from drying out and cracking.
If you are more into watching videos NRS has a good video here. Also if you are wanting to send your gear in Immersion Research does repairs on all brands. Koktat has repair program with some different levels of repair work but only works on Kokatat brand gear.


